// Guide
Chain and sprocket wear — when to replace, and why you replace them together
Your chain is the cheapest part of your bike that can wreck the expensive ones. Here's how to tell when it's done, what to read off a sprocket, and why you don't replace one without the other.
Updated 12 May 2026
A chain is the cheapest part on your bike that can wreck the expensive ones. Let it stretch too far and it eats your sprockets, your guide, your slider, and on a bad day your cases. None of it is dramatic. It happens slowly enough that you don’t notice until you’re paying for it.
This is how to spot a chain that’s done, what the sprocket teeth tell you, and why you almost always replace both at the same time.
The 1% stretch rule
Chains don’t stretch the way the word implies. The metal doesn’t elongate. The pins and bushes inside each link wear down, every link gets fractionally longer at the wear point, and across 120 links it adds up to enough slack to ride differently on the sprocket teeth.
The workshop test, no calipers needed. Pull the chain back off the rear sprocket at the three-o’clock position. If you can expose half a tooth or more, the chain is at the end of its life. If you can pull a full tooth clear, it’s past it.
The precise version is a ruler. Measure across 21 pins on a 520-pitch chain. New, that span is 317.5 mm. Replace at 320.5 mm. That’s the 1% number. A chain stretched a full 2% is destroying your sprockets every ride.
A stamped chain wear gauge is £8 and removes the argument with yourself about whether the chain is “still alright.”
Reading the sprocket
Sprocket teeth wear in a way that’s diagnostic. Once you’ve seen the patterns you can date a drivetrain at a glance.
A fresh sprocket has symmetric teeth — clean triangles, same profile on the drive side as the coast side. A worn sprocket has hooked or shark-finned teeth. The drive face wears faster than the coast face, so the tooth ends up looking like a wave: vertical or undercut on one side, ramped on the other. Once you see hooks, you have weeks at most.
What causes it is a stretched chain. The worn chain sits slightly further out on the sprocket than it should, climbs the leading edge of each tooth instead of dropping into the valley, and at thousands of revolutions a minute that climbing motion files the drive face into a hook.
If front teeth look worn but the rears look fine, or the other way round, the chain alignment is probably off. Check it before you spend on parts. The rear wheel alignment marks aren’t always accurate; a string-and-eye check from the front sprocket past the rear is more reliable.
Why you replace them together
The single most expensive mistake people make is putting a new chain on worn sprockets.
A new chain has tight, factory pitch. Worn sprockets have tooth gaps that have been opened up — slightly wider than spec, slightly shark-finned. The new chain doesn’t seat in those gaps the way the old chain did. It rides high, it skips under load, and the sharp new pins file at the soft worn teeth from the wrong angle. In five rides the new chain is stretching at an accelerated rate to “match” the worn sprockets, and the sprockets are eating themselves the rest of the way.
You spent £80 on a chain to give yourself a drivetrain that’s worse in a month than the one you started with.
The rule: chain and rear sprocket together, always. The front is a separate decision (next section). If you want to save money, save it by running the existing chain a few rides longer before replacing the set. Not by mixing new with worn.
A full kit — chain, front, rear — usually comes out cheaper than the three parts bought separately. At most service intervals it’s the right answer.
O-ring, X-ring, or standard
Three constructions. Rough order of cost and life.
Standard (non-sealed) chains have no seal between the side plates. The internal grease washes out in the first wet ride and you’re reapplying lube externally for the rest of the chain’s life. Lightest, cheapest, shortest life. Most people run them in pure MX where the chain gets changed often anyway and weight matters.
O-ring chains have a round rubber ring between each pair of side plates, sealing the internal grease in. Heavier, more drag (a couple of horsepower at the wheel on a 250F), much longer life. Standard for trail and enduro.
X-ring chains are an O-ring with a better seal — X-shaped cross-section, four contact points instead of two, smaller contact area. Less drag with equivalent or better sealing. Top of the price ladder. Worth it for big-bore enduro and dual-sport. Overkill on a 125 MX bike that lives for six races.
The deciding factor is the application, not the brand. MX racer changing chains every few meetings: standard is fine. Trail rider running wet and gritty 30 hours between changes: O-ring minimum, X-ring if budget allows.
The front sprocket wears twice as fast
People are surprised by this until they look at the geometry. A 13-tooth front and a 50-tooth rear are doing the same total work, but the front makes nearly four turns for every one of the rear — and the chain wraps fewer teeth, so each tooth sees the load more often.
A front worn out at 25 to 30 hours can be paired with a rear that’s still got another full life left.
Two practical points. Always check the front first. It’s the most hooked, the most often ignored (hidden behind the case cover), and it’s the cheapest part. And if the front is shark-finned but the rear teeth still look symmetric, replace the chain and the front only. That’s the one acceptable case of mixing — a new chain on a fine rear is harmless as long as you swap the worn front at the same time. The rear isn’t applying the wear pattern. The front is.
Worth keeping a spare front sprocket on the bench. Eight quid. Five-minute change with the chain off.
Replacement intervals by riding style
Approximate. Terrain, lube discipline and chain spec move the numbers. Useful starting points.
| Riding style | Chain life (hours) | Notes |
|---|---|---|
| MX racing | 15–25 | Standard chain, replaced often. |
| MX practice / training | 30–40 | Same chain, longer life because fewer flat-out lap counts. |
| Enduro / extreme | 30–50 | O-ring required. Sand and water shorten life fast. |
| Trail riding | 50–80 | X-ring or O-ring. Lube discipline matters most here. |
| Play / casual | 80–120 | Most riders never wear a chain out. They get the bike stolen first. |
Write the hours on the air filter and the install date of the chain on a piece of tape under the seat. Sounds excessive. Means you actually know when you’re due instead of guessing and being three rides past it.
Tools you need
For a chain and sprocket change:
- Chain breaker for cutting the old chain. £25 to £40 gets a workshop-grade one. The bargain-bin tools bend the pin pusher on the first stubborn link.
- Rivet tool for swaging the new master link. Some breakers include a rivet function; if yours doesn’t, get a proper rivet press. Clip-style master links are not safe on MX or enduro power. Always rivet.
- Front sprocket socket — usually 27, 30, 32, or 36 mm depending on the bike. Check the manual.
- Rear sprocket nut socket — usually 13 or 14 mm, occasionally 17. Torque wrench for the final tighten.
- Medium thread lock on the front sprocket bolt every time. Rear sprocket nuts too if your bike doesn’t use captive lock nuts.
Front sprocket bolt torque varies by bike — check the manual. 30 to 35 Nm with thread lock is right for most 250F and 450F MX bikes. Rear sprocket bolts typically 30 Nm.
The trick for a seized front sprocket bolt: bike in gear, sit on it, friend levers the rear wheel. Engine compression stops the engine from turning while you crack the bolt. Beats trying to wedge a screwdriver through the case.
Don’t forget the guide, the slider and the rollers
A chain that’s been left to stretch saws at every plastic part it touches.
Chain slider — the plastic block on top of the swingarm. If the chain has worn a deep groove, replace it. A grooved slider lets the chain track sideways under load and eat the inside of the swingarm itself, which is several hundred pounds you don’t want to spend.
Chain guide — the U-shaped piece behind the rear sprocket. Plastic guides wear fast; annual replacement is reasonable on an MX bike. A worn guide lets the chain bounce off the rear sprocket on landings, which derails the chain and at worst locks the rear wheel mid-air. Cheap part, easy fit.
Rollers — small plastic wheels above and below the swingarm on some bikes. Replace when the bearings feel rough or the outer plastic is worn to a knife edge. £15 each.
Always change the slider with the chain. A fresh chain on a knife-edge slider grinds through in days. The guide and rollers can run a bit longer if they look healthy.
// In stock now
Drivetrain parts in stock
Chains, sprockets, guides, sliders. Stocked sizes vary by bike — filter by your bike to see what fits.
MOOSE OFFROAD HARD-PARTS
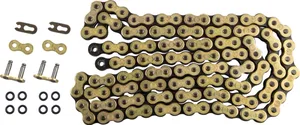
MOOSE OFFROAD HARD-PARTS CHAIN 520-FB / 120 LINKS / O-RING / GOLD
£104.68
MOOSE OFFROAD HARD-PARTS
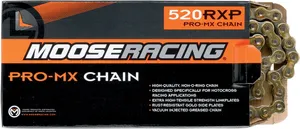
MOOSE OFFROAD HARD-PARTS CHAIN 520-RXP / 120 LINKS / PRO-MX / GOLD
£78.90
MOOSE OFFROAD HARD-PARTS
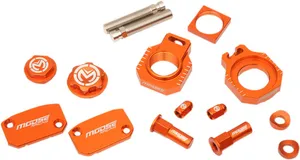
MOOSE OFFROAD HARD-PARTS BLING PACK ORANGE
£77.25
MOOSE OFFROAD HARD-PARTS
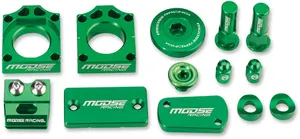
MOOSE OFFROAD HARD-PARTS BLING PACK GREEN
£76.42
MOOSE OFFROAD HARD-PARTS
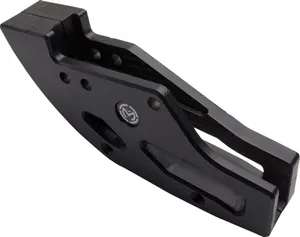
MOOSE OFFROAD HARD-PARTS PRO CHAIN GUIDE BLACK
£75.08
MOOSE OFFROAD HARD-PARTS
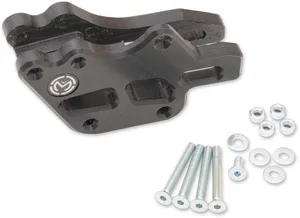
MOOSE OFFROAD HARD-PARTS CHAIN GUARD PRO KAW
£74.92
MOOSE OFFROAD HARD-PARTS
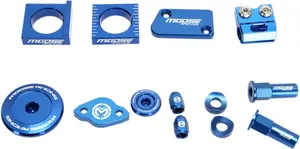
MOOSE OFFROAD HARD-PARTS BLING PACK BLUE
£68.94

MOOSE OFFROAD HARD-PARTS
MOOSE OFFROAD HARD-PARTS CHAIN 520-RXP / 116 LINKS / PRO-MX / GOLD
£62.29
// Find what fits your bike
Get the right chain pitch first time.
Wrong pitch is the most common rebuild mistake. Tell us the bike, we'll show you what fits — pre-filtered, no guessing.
22,326 parts · 55 brands
// FAQ
Frequently asked questions
Is a gold chain actually worth the money?
Mostly cosmetic on a dirt bike. The gold is a coating on the side plates and it scuffs off inside the first hour of trail riding. What matters is whether it's an X-ring or O-ring chain rated for your output, and whether the side plates are forged or stamped. Pay attention to the spec, not the finish.
Can a stretched chain be shortened by removing a link?
No. If it's stretched, the rollers and bushes are already worn through. Shortening hides the slack for a couple of rides and then the chain skips on the sprocket. Replace it.
How often should I lube a chain on a dirt bike?
Every ride. A quick spray after the pressure-wash, while the chain is warm and dry, keeps it tracking straight. Avoid heavy waxes that grab dust. A light wet lube on a clean chain beats a thick coat on a dirty one.
What's safe to clean an O-ring chain with?
Paraffin is the workshop default. Diesel works too. Both are mild enough not to attack the seals between the side plates. Avoid petrol, brake cleaner, and anything labelled aggressive degreaser — they kill the seals, the internal grease dries out, and the chain is finished in a couple of rides. Nylon brush, paraffin, water rinse, blow dry, re-lube.
Aftermarket sprockets — as good as OEM?
The good brands are better, the bottom of the market is worse. Steel rears from established manufacturers outlast the aluminium OEM part by a factor of two or three, because aluminium softens at the tooth tip under MX load. Front sprockets are almost always steel regardless of source. The risk is the cheap end — thin material, soft heat-treat, sloppy hole spacing. If the brand is unfamiliar and the price looks too good, it is.
Why does an aluminium rear sprocket wear so fast?
Weight. A 50-tooth aluminium rear is roughly a third the weight of the steel equivalent, which matters for unsprung mass and acceleration. The teeth are soft enough that an MX chain hooks them in 20 to 30 hours. Pros run aluminium and change it every couple of meetings. Weekend riders are usually better off with steel, or a hybrid — aluminium core, steel teeth.