
// Guide
Fork seal leak — when to swap, when to ride it
A weeping seal is not the same problem as a blown one. Here's how to tell which you've got, the trick that buys you a weekend, and when oil on the rotor means you stop riding.
Updated 14 May 2026
You’ll see it first as a dark ring on the lower fork leg where you didn’t expect one. Wipe it, ride, look again. If it’s back, you’ve got a leaking seal. The question is which kind, how soon you have to deal with it, and whether you can drag a meeting out of it before you do.
A weeping seal and a blown seal are not the same problem. One is a weekend job in the workshop; the other is “stop riding now, you’re about to bin it on the front brake.”
The film test
The fastest diagnosis you have is a clean rag and a short ride.
Wipe both fork legs completely dry, top to bottom. Look at the dust seal — the soft rubber boot at the top of the lower leg — and the band of stanchion just above it. Both clean. Ride a slow lap, nothing heroic, just enough compression to cycle the forks a few dozen times. Come back, look again.
Clean leg, no oil: the seal is fine. What you saw was old residue or a single dribble from a worn dust seal. Not a job for today.
A film of oil 5–10 mm above the dust seal: weeping seal. You can ride on this for a meeting, possibly the rest of the season, if you stay on top of the wipe-down. Schedule a swap.
Oil pooled at the dust seal lip, or tracking down the lower leg: blown seal. The lip has lost contact with the stanchion. You don’t ride this any further than the workshop.
The reason the film test works is that fork seals don’t fail gradually in volume — they fail in containment. Either the lip is sealing or it isn’t. A weeping leg is one with surface contamination on the lip but a structurally intact seal. A blown leg has a torn lip, a hardened lip, or a stanchion the lip can’t sit on.
What’s actually leaking
Top to bottom, what’s inside the upper end of the lower leg:
- Dust seal — soft black rubber boot. Keeps grit out. Doesn’t seal oil.
- Snap ring or wire clip — holds the next part in.
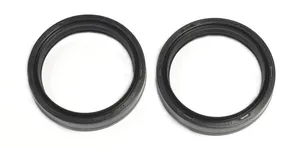
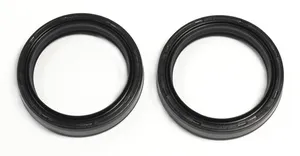
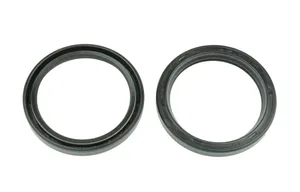
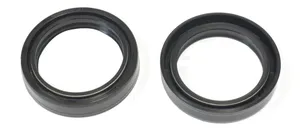
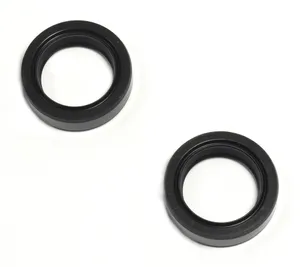
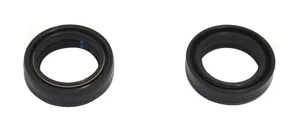
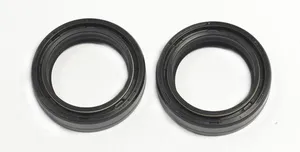
- Oil seal — the load-bearing seal. Two-lipped, sprung. This is the part that fails.
- Backup ring — supports the oil seal.
- Bushings — two of them, top and bottom, riding on the stanchion. These wear at a much slower rate but they’re what eventually kills a fork.
The stanchion is the polished tube sliding inside all of it. Hard-chrome plated on most modern forks, anodised aluminium on some. The seal lip rides on the stanchion every time the fork compresses — thousands of times in a moto. Any imperfection on that surface — a pit, a scratch, a ridge — slices the lip incrementally.
When riders say “the seal is gone,” nine times out of ten the seal is fine and the stanchion is the problem. The seal is just the visible failure.
Why seals go
Five reasons, in rough order of frequency.
Grit under the dust seal. A single grain of sand finds its way past the dust boot, settles on top of the oil seal, and rides up and down on the seal lip every compression. After a couple of rides the lip is scored. This is the most common cause of leaks in trail and enduro bikes — anywhere that rides in dust or sand.
A hard hit on a square edge. Rock garden, root, kerb on a transfer. The fork bottoms or near-bottoms and the seal lip is briefly forced sideways. Doesn’t always tear it; does always shorten its life.
Sitting through a winter. Springs hold the fork at full extension while it’s on a stand. The seal lip parks in one position on the stanchion for months. Rubber takes a set, the spring loses tension at that point, and the first few cycles in spring weep before they re-seat. Sometimes they re-seat fine. Sometimes they don’t.
Pitted or worn stanchion. The slow killer. Sand-blasting from grit thrown up by the front wheel chews the chrome over hundreds of hours, then once the chrome is breached the seal lip rides on bare aluminium and fails fast. Sun-cracked, dusty stanchions live shorter lives than washed ones.
Wrong oil weight or contaminated oil. Old oil — black, watery, contaminated with seal debris — wears the bushes faster, and worn bushes let the stanchion move laterally inside the seal. Fork oil is cheap. Riding three years on the original fill is the most expensive habit in this section.
The cleanup trick that buys you a weekend
Sometimes the seal lip is fine and what you’re chasing is a grain of grit. There’s a trick worth knowing.
Bike on a stand, front wheel hanging. Push the dust seal up the stanchion 10 mm using a thin flathead screwdriver — gently, you’re sliding it, not levering it. With the dust seal raised, you can see the top of the oil seal. Take a strip of clean glossy photo paper or a Seal Mate tool — a thin curved plastic blade made for this exact job — and slide it down behind the seal lip, all the way around the stanchion. Pump the fork two or three times by hand. Pull the tool out and any grit comes with it. Wipe everything clean. Drop the dust seal back into place.
Test ride. If the leak is gone, you bought yourself anything from a week to a season. If it’s back inside two laps, the lip itself is torn and you need a real swap.
Seal Mate is £8. Save fifty quid in workshop time if it works.
When you stop riding it
The line is the brake rotor.
Fork oil on a brake disc is a bin-the-bike problem waiting to happen. Brake fluid can’t grip a contaminated pad, and a fresh-fork-oil contamination requires a full disc clean, often a pad swap, and a long bedding ride to be confident the front brake actually stops you. On a fast section, that’s not a margin you ride into.
Other red flags, all “stop now”:
- Dust seal flapping or split. The next compression pushes oil out openly.
- Stanchion shows fresh oil after every compression rather than after every ride.
- A spongy, knocky feel in the front end under braking — usually the fork has lost so much oil that the cartridge is cavitating. Cartridge damage is several hundred pounds you don’t want to add.
- The leak appeared after a known crash on the front. Could be a bent stanchion, not just a torn seal. Forks pulled forward bend at the lower triple before they bend visibly anywhere else.
If none of those apply and the oil is staying well clear of the rotor, you have time. Schedule the work, ride the weekend.
Swap vs full service
Three jobs at three price points.
Seals only. Pull the forks, slide the legs apart, drop in new dust seals and oil seals, refill with the oil already in the fork (if it still looks clean — straw-coloured, not black). 60–90 minutes per pair on a bench. Cheapest path. Right answer if the leak was caused by grit and the oil is recent.
Seals plus oil refresh. Same job, plus drain the cartridge oil and refill with new oil to the spec air gap. The cost adds a couple of litres of fork oil. Worth doing every 30–50 hours regardless of leaks. Fork performance falls off long before a leak shows; old oil rides harsher and overheats faster.
Seals plus oil plus bushes. Add a top and bottom bush per leg. The tell is lateral play — with the wheel out, grip the lower fork leg and try to rock it side-to-side against the stanchion. Any perceptible movement means the bushes are due. New bushes restore the precision the front end loses gradually; a fork with worn bushes will leak again within a year of a seal-only swap because the stanchion is moving sideways inside the seal lip on every compression.
For a working-rider MX bike: seals plus oil refresh every other season, bushes every third or fourth. For a trail bike doing twice the hours in dust: shorten everything.
The job in 90 minutes
Workshop-level overview — this isn’t the step-by-step. The headline is: it’s not hard work if you have the tools, and it’s expensive misery if you don’t.
What you need on the bench:
- Bike on a stand with the front wheel removed.
- Triple-clamp socket and the right Allen keys for your bike’s top caps.
- A seal driver that matches your fork diameter (48 mm on most modern MX, 43 mm on older or smaller bikes). A piece of PVC pipe works in a pinch; a proper driver costs £20 and won’t slip.
- Fork oil to spec — quantity and weight from the manual.
- A vice with soft jaws, or a fork holder.
- A clean bench. Grit on a fork build kills the new seal in a ride.
The headlines:
- Drain old oil into a clear container. Tells you the truth about your service history. Clear straw oil = recent service. Black, gritty oil with foam = neglected, do the bushes too.
- Bleed both legs after refill. Cartridge forks trap air. Pump slowly with the spring out, hold at full extension for ten seconds, repeat until resistance is consistent.
- Air gap is non-negotiable. Measured from the top of the stanchion to the oil surface with the fork fully compressed and the spring out. Wrong air gap is the difference between a fork that’s plush and one that packs down on every jump.
- Torque the top caps and pinch bolts to spec. Over-torque cracks the cap; under-torque lets it back off in a race.
If any of that reads like a foreign language, the right answer is your local suspension shop. £100–£150 plus parts for a seal-and-oil service on a pair of forks is fair, and it comes back set up properly.
The right kit for your forks
Fork seals are diameter-specific. The first thing to know is the size — 48 mm and 43 mm cover most modern MX bikes, but plenty of older trail bikes are 41 mm or 45 mm, and some KYB-equipped enduro bikes are 49 mm. The size is usually marked on the stanchion near the top cap, or in the manual.
A kit contains one oil seal, one dust seal, and usually one wire clip per leg. You need two of these — one per fork. Brands worth a look:
- SKF low-friction kits — green sealing material, distinctly slipperier off the top of the stroke. Outlast OEM by a healthy margin. Premium price.
- All Balls Racing — workhorse aftermarket. Good seal life at a moderate price. Most common workshop default.
- Pivot Works — similar tier to All Balls.
- OEM (KYB, Showa, WP) — perfectly fine, often slightly cheaper than the premium aftermarket. Worth it if you trust the dealer and the stock is fresh — old seals on a shelf for three years don’t seal as well as new ones.
What to avoid is the bottom of the eBay market — unbranded kits at a quarter the price. The seal lip is a precision rubber moulding. Cheap moulds have inconsistent lips and inconsistent durometers, and they fail inside a season.
The seal is cheap. The labour of doing the job a second time is not.
// In stock now
Suspension parts in stock
Seals, oil, springs, bushes. Fitment varies by bike — filter by yours to see what fits.
ATHENA
ATHENA FORK OIL SEAL KIT MGR-RS 43x52,7x9,5/10,3
£35.20
ATHENA
ATHENA WIPER SL 48X58.4X5.8/11.8
£28.72
ATHENA
ATHENA FORK SEAL RSD 48X57.8X9
£27.20

ATHENA
ATHENA FORK OIL SEAL KIT MGR-RSD2 30x40x7/9 SHOWA
£11.52
ATHENA
ATHENA FORK OIL SEAL KIT MGR-RSA 41x54x11
£8.45
ATHENA
ATHENA FORK OIL SEAL KIT MGR-RSD 30x42x10,5
£8.30
ATHENA
ATHENA FORK OIL SEAL KIT MGR-RSA 33x46x11
£7.78
ATHENA
ATHENA FORK OIL SEAL KIT MGR-RSA 35x48x11
£7.78
// Find what fits your forks
Get the right seal kit first time.
Seal ID is fork-leg-diameter specific. Tell us the bike, we'll show you what fits — pre-filtered, no guessing.
22,326 parts · 55 brands
// FAQ
Frequently asked questions
Can I ride one more weekend with a weeping seal?
If the leg wipes clean and a short ride doesn't bring oil back, yes — for that weekend. If oil reappears within a lap or pools at the dust seal, no. The deciding factor is the rotor. Any oil tracking down to brake-disc height and you stop, full stop. Cleaning a contaminated pad takes longer than a seal swap.
Should I do both fork legs even if only one is leaking?
Yes. Seals age together, dust seals harden together, and the oil in the dry leg is the same vintage as the oil in the leaking one. You're already off the bike with the forks on the bench — the second seal kit costs less than the labour of repeating the job in six weeks.
Will a Seal Mate (or a slip of paper) actually fix a leak?
Sometimes. If the leak is grit caught under the oil seal lip, sliding a thin film around the inside of the dust seal and back out drags the grit clear — that buys you weeks or the rest of the season. If the seal lip itself is torn, or the stanchion is pitted, no film job will hold. Try it once. If oil's back after a ride, the seal is done.
Pitted stanchions — is there a fix short of replacement?
Light pitting above the seal travel zone can be polished out with very fine wet-and-dry, but the moment a pit is inside the working stroke, no seal will hold against it for long. The seal lip needs a smooth surface to track on; a single deep pit slices it on every compression. Replacement (or hard-chrome re-coating, on premium kit) is the only real answer once the working surface is hit.
What weight fork oil should I use?
What the manual says. Modern dirt bikes are spring-and-cartridge forks where the oil is mostly damping for the cartridge — different bikes want different viscosities and different air gaps. A 5W in a fork that wants 2.5W gives you a harsh ride and overheats the cartridge. The number on the bottle isn't strictly comparable across brands either; stick to the spec for your bike, or to what your suspension shop recommended last time it was serviced.
Aftermarket seals — worth the extra over OEM?
For most riders, yes. Quality aftermarket seals from established suspension brands use lower-friction lip materials and harder-wearing dust seals than the OEM part. The forks feel plusher off the top of the stroke and the dust seal holds out grit longer. The risk is the bottom of the market — unknown brands at a third the price will leak inside a season. Stick with the names your local suspension shop recognises.