// Guide
Race sag setup — how to measure and set sag on a dirt bike
Sag is the first setup job on any dirt bike, and the one most riders get half right. Here's how to measure both sag numbers properly, what they're telling you, and what to do when the spring won't get you there.
Updated 23 May 2026
Sag is the first setup job on a dirt bike, and the one most riders get half right. They measure once when the bike is new, set it close to the workshop manual number, and never touch it again. Six months later the bike feels wrong, they wind clickers in and out, swap fork oil, blame the tracks — and the sag has been off by 8 mm the whole time.
It’s a tape measure and ten minutes. Here’s how to do it properly, what each number is telling you, and what to do when the spring won’t get you there.
Why sag is the first setup job
Sag is where the bike sits in its travel when you’re on it. Get it right and the bike sits in its sweet spot — geometry as designed, fork and shock both with travel above and below to absorb hits in either direction. Get it wrong and the whole setup compensates around the error.
Clickers tune how the suspension moves through that travel. Sag decides where in the travel it lives. No amount of compression damping fixes a bike that’s sitting too low; no amount of rebound damping fixes a bike that’s standing up too tall. Sag comes first. Every time.
That’s why a fresh shock fitted to a bike with the wrong spring still rides badly — the new oil and seals are doing their job, but the spring is putting the bike in the wrong position before the damper even gets a chance.
The three measurements
You take three measurements, all from the same two reference points on the back of the bike.
L1 — fully extended. The bike held off the ground (paddock stand, or wheel lifted), suspension at its full travel. This is your baseline.
L2 — static sag. Bike on the ground, no rider, settled under its own weight. The difference between L1 and L2 is your static sag (also called free sag).
L3 — race sag. Bike on the ground, you sat on it in full kit, feet on the pegs, hands on the bars, looking forward. The difference between L1 and L3 is your race sag (also called rider sag).
Two numbers come out the other end: race sag (L1 − L3) and static sag (L1 − L2). They both matter. Race sag tells you the bike is sitting in the right spot when you’re riding. Static sag is the cross-check that says the spring is the right rate to get you there.
Tools you need
Almost nothing.
- A tape measure marked in millimetres. Not inches — every spec number is metric, and converting at the bench is how you set sag wrong.
- A mate. They hold the bike upright while you sit on it and read the tape. You swap when it’s their turn.
- A paddock stand for the L1 measurement, or somewhere to brace the rear wheel off the ground.
- The right spanner for the shock preload lock-ring. C-spanner on most bikes; a pin punch and a soft hammer if you don’t own the proper tool. Don’t use mole grips on the collar.
- Optional: a sag scale or strap if you genuinely ride alone, but a mate is faster and more accurate.
The bike should be clean and dry. A wet bike with mud caked on the rear fender weighs a couple of kilos more than the same bike clean, and that’s enough to push static sag out by 3–4 mm.
How to measure, step by step
- Pick two reference points. Bottom point: the centre of the rear axle. Top point: a fixed spot on the rear fender directly above the axle — a bolt head or a marked seam is ideal. Avoid flexy plastic in the middle of a panel; you want a point that doesn’t move when the bike moves.
- L1 — extended. Put the bike on the paddock stand so the rear wheel hangs free. Measure axle-to-fender point. Write it down. Bounce the rear wheel gently to make sure the suspension is fully topped out.
- L2 — static. Off the stand, bike upright on both wheels. Push down on the rear once and let it rise; lift the rear once and let it settle. Now measure axle-to-fender. Write it down. Static sag = L1 − L2.
- L3 — race. Get on the bike in full kit, feet on the pegs, hands on the bars, looking forward at the horizon — not down at the tape. Your mate holds the bike upright with a hand on the bar end or the fender. Bounce the rear with your weight once and let it settle. Your mate reads axle-to-fender. Race sag = L1 − L3.
The bounce-and-settle step matters more than people think. Suspension that hasn’t been worked through a small cycle holds a bit of stiction and reads tight. A single push down and lift up before each measurement settles it into its natural ride height. Skip the bounces and you’ll set sag a few millimetres tighter than it actually is.
Re-measure each number twice and average if they don’t agree. If they’re more than 2 mm apart, you’re bouncing wrong or the reference point is moving — fix that before you change anything on the bike.
Target sag numbers
These are starting points, not laws. Your bike, your weight in kit, and the kind of riding you do all push the window around. But this is where you aim first ride.
| Riding style | Race sag (L1 − L3) | Static sag (L1 − L2) |
|---|---|---|
| MX racing | 100–105 mm | 30–40 mm |
| Enduro / hard enduro | 105–110 mm | 30–40 mm |
| Trail / play | 105–115 mm | 30–40 mm |
MX runs tighter for a sharper-turning bike that sits up on the brakes. Enduro runs looser to put weight on the rear wheel and keep traction in rough going. Trail riders go looser still — slower pace, comfort over precision.
Some riders run outside these ranges deliberately. A rider who pushes the front hard might run shorter race sag to keep the front end loaded; a rider in deep sand might run longer sag for traction. Get into the recommended range first, ride a few sessions on it, then tune off that baseline if you have a reason.
If your manual or your suspension tuner gives you a number, use theirs over this table. They know your specific bike and they have a reason for the call.
Adjusting shock preload
Race sag is set on the shock, not the fork. The fork’s preload is fixed on most cartridge forks; the shock has a preload collar that turns to add or remove spring tension.
- Find the collar on the shock body, just above the spring. There’s a lock-ring above the adjuster collar.
- Slacken the lock-ring with a C-spanner or pin punch. Don’t try to turn the adjuster against a tight lock-ring — you’ll bugger the threads.
- Turn the adjuster collar. Wind in (down the body) = more preload = less sag. Wind out (up the body) = less preload = more sag.
- Lock the lock-ring back against the adjuster.
- Re-measure race sag. Adjust again if needed.
A full turn of the collar moves race sag by roughly 2–3 mm on most bikes. So if you’re 6 mm out, expect to wind two to three full turns. If you’ve been winding for ten minutes and you’re still chasing it, the spring rate is wrong (see next section).
The lock-ring is not optional. Race vibration will walk the adjuster collar over a long enough ride, and you can lose all your preload mid-moto without noticing.
When you can’t reach target sag
This is the moment that catches most new riders out: race sag is in spec, but static sag is way off, or you’ve wound preload to the stops and can’t get race sag short enough.
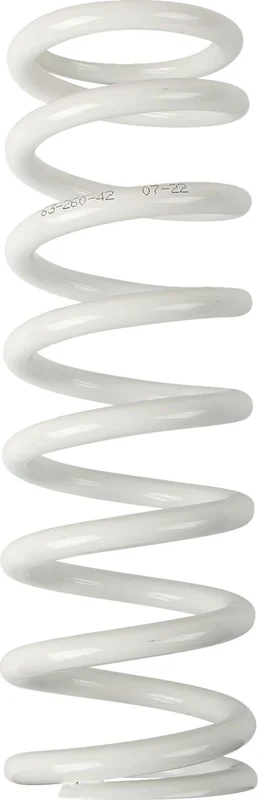
Both mean the spring rate is wrong for your weight.
Race sag right, static sag under ~25 mm: the spring is too soft. You’ve cranked in heavy preload to compress a weak spring far enough to fake the right race sag. The bike rides low through the stroke, blows through travel on hits, and runs out of preload range whenever your kit weight changes.
Race sag right, static sag over ~45 mm: the spring is too stiff. The bike barely settles under its own weight, and your race sag is in spec only because the spring is fighting you the whole way down. Bike feels harsh, never uses its travel, deflects off small bumps.
Race sag still too long even at maximum preload: spring is way too soft, or you’ve gained weight since last season.
Race sag still too short even at zero preload: spring is too stiff.
The fix is a new spring rated for your weight in full kit, not more preload. Stock springs are picked for an average rider — somewhere around 75 kg in kit, depending on the bike. If you’re well outside that, the bike was never set up for you and never will be without a spring change.
Fork and shock should be changed together so the front and rear stay balanced. Putting a stiffer rear spring under a soft fork makes the bike push on the front in turns; putting a stiffer fork on a soft rear makes it stand up out of corners. Spring rate is a pair-of-numbers conversation, not a single one.
Setting fork sag
Less commonly checked, but worth knowing exists.
Fork sag is the same idea — how far the fork compresses under the rider — but it’s measured at the front and most modern cartridge forks don’t have external preload adjusters. Use the same procedure: L1 with the front wheel off the ground, L2 with the bike on both wheels, L3 with you on it in full kit. Reference points are the bottom of the fork lower and a point on the fork tube just above the upper triple clamp, or any other fixed pair you can measure cleanly.
Target rider sag on the front: 30–40 mm. Static sag on the front isn’t normally measured — fork weight is low enough that it doesn’t compress meaningfully on its own.
If the fork sag is wrong, the fix is normally a spring change on cartridge forks without preload adjusters, or a preload-cap adjustment on the forks that have them. Air-sprung forks adjust by pressure — your manual specifies the PSI range for your weight.
Most riders set rear sag, ride the bike, and only check fork sag if the bike pushes the front in turns or dives badly on the brakes. That’s fine. Get the rear right first.
Common mistakes
These are the ones that come up over and over again at the start of every season.
- Measuring without full kit. Half-kit reads short by a full centimetre. The bike doesn’t know you’ll have body armour and boots on when you ride.
- Skipping the bounce. Stiction holds the suspension a few mm tight if you don’t cycle it. Every measurement gets a small push-down and lift-up first.
- Lazy reference points. A point in the middle of a flexy rear panel moves under hand pressure. Use a bolt head or seam, not a sticker.
- Wet or muddy bike. Caked mud is weight. Clean the bike before you measure.
- Bike on a slope. Even a small slope tilts the geometry and changes the answer. Find flat concrete.
- Reading the tape at an angle. Read it square — eye directly in line with the marks, not from above or from the side. Easy way to lose 2 mm.
- Doing it once and forgetting. Spring weight settles, kit weight drifts, your weight drifts. Re-check every season.
When to re-check
- Start of every season. Single biggest reason most riders’ bikes drift off setup.
- After any spring swap, ride-height change, or linkage swap. Anything that touches the rear geometry resets your baseline.
- After your kit weight changes meaningfully. Different boots, a winter jacket, gaining or losing 5 kg.
- Any time the bike “feels off” in a way you can’t account for. Cheap diagnostic. Takes ten minutes. Rules sag in or out before you start chasing fork oil or clickers.
For everything that happens after your sag is dialled — fork oil, seals, linkage bearings, nitrogen charges, the service clock — that’s the next read: Suspension service intervals.
// In stock now
Suspension parts in stock
If your sag won't settle in spec, the spring rate is wrong for your weight. Filter by your bike to see fork and shock springs that fit.
ATHENA
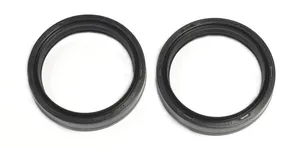
ATHENA FORK OIL SEAL KIT MGR-RS 43x52,7x9,5/10,3
£35.20
ATHENA
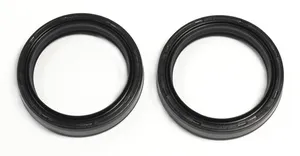
ATHENA WIPER SL 48X58.4X5.8/11.8
£28.72
ATHENA
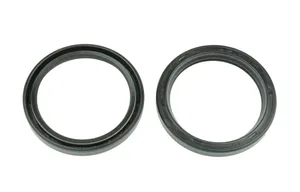
ATHENA FORK SEAL RSD 48X57.8X9
£27.20

ATHENA
ATHENA FORK OIL SEAL KIT MGR-RSD2 30x40x7/9 SHOWA
£11.52
ATHENA
ATHENA FORK OIL SEAL KIT MGR-RSA 41x54x11
£8.45
ATHENA
ATHENA FORK OIL SEAL KIT MGR-RSD 30x42x10,5
£8.30
ATHENA
ATHENA FORK OIL SEAL KIT MGR-RSA 33x46x11
£7.78
ATHENA
ATHENA FORK OIL SEAL KIT MGR-RSA 35x48x11
£7.78
// Find what fits your bike
Springs, sized to you and your bike.
Spring rate is matched to rider weight in kit. Tell us the bike, we'll show you what fits — fork and shock as a pair.
22,326 parts · 55 brands
// FAQ
Frequently asked questions
Do I really need a friend to measure sag?
Yes. Holding the bike upright on its wheels while you read a tape measure to the nearest millimetre is not a one-person job. You can rig a strap to a beam or get a sag scale, but the cheapest and most accurate setup is still a mate, a tape, and ten minutes. If you ride alone, find another rider — everyone needs theirs checking too.
What if my race sag is right but static sag is off?
That's the spring rate telling you it's wrong for your weight. If race sag is in spec but static sag is under ~25 mm, the spring is too soft and you've wound in preload to fake the right number. Over ~45 mm and the spring is too stiff. Either way no clicker setting will fix it — it's a parts change, not a service.
Is half-kit good enough for measuring sag?
No. Boots, helmet, body armour, hydration pack if you ride with one. Race sag is set against the weight that actually rides the bike, and a full enduro kit runs 8–10 kg over the rider in shorts and a t-shirt. Half-kit measurements come out wrong by a clean centimetre.
How often should I re-check sag?
Start of every season, any time you swap springs or change ride height, and any time the bike feels off in a way you can't account for. Springs settle over their first few hours and then drift slowly over years. Your kit weight changes between summer and winter too. A 30-second check before the first ride of a new month is cheap insurance.
What's the difference between race sag and rider sag?
They're the same number. "Race sag" is the racing term, "rider sag" is the term you'll see in some workshop manuals. Both mean the same thing: how far the bike settles with you sat on it in full kit, feet on the pegs, hands on the bars. The other number — static sag, free sag, unloaded sag — is the bike under its own weight only.
Can I just count preload turns instead of measuring?
No. Preload-per-turn varies by bike, by spring, and by how clean the collar threads are. Two turns on your mate's bike is not two turns on yours. The tape doesn't lie. The turn count does. If you're swapping a spring and starting from zero, measure; if you're trimming an existing setup by a millimetre or two, you can ballpark by feel and confirm with the tape.